Joshua has his last soccer game today. It's raining, but this is a make up from a rained out game earlier in the season, so I guess they decided rain or shine, it had to be played. SOOOOOO, we are headed to a game today in the nastiness---of course, if you are a seven year old boy, this is like heaven to you!!! Playing in the rain without your mom complaining about it---what a great day!
I'm the "team mom"--which in this league just consists of sending a weekly e-mail and buying the trophy and coach's gift for the last game. This is can do---being the team mom of these traveling teams and all the arrangements that go into that---not for me!
We got the coach a giftcard, so I just made a giftcard holder (Kristin Werner's again---I know, I've made a bunch, but they are SOOOOO quick and easy and that's what I love!) for him and a card that has room for everyone to sign. I also had this bag that I added some paper to and voila, a "gift ensemble". Doesn't that sound a lot nicer than it is!? :)
I made this card using the only "soccer" thing I have--this ball is from Stampin' Up!'s Good Sport. I'm pretty sure it's retired. I still use it for all things "sporty", so I can't get rid of it. I used some paper from my stash. I looked on the back and it said Bo Bunny Press, Romance Dots. I just needed the color scheme so I went with the paper. I used these colors because the team colors are black and red and white, so this paper made it easy. I also embossed some basic black with the spots & dots embossing folder for some texture. The layout was a spin on Jen delMuro's Sketch for You to Try from last week.
I stamped the ball on Basic Black paper with Craft White ink and then heat embossed it with some Ranger white embossing powder.
I made the tag with Nestabilities tag dies and used the sentiments from Rustic Branches. I tied some ribbon on there---is that too much for a man's card? Do you use ribbon on cards for men?
I added white paper with stamped soccer balls on the inside of the card. I don't usually decorate the inside, but I wanted to make sure we had enough space for everyone to sign it. Of course, I should have had this card at practice on Thursday, but that's not how I operate---sadly. But, it will get done either way!The gift card holder is very much like the card. The link I gave you above --(Kristina Werner's)
will take you to her blog which has a link to her template for these giftcard holders---these are honestly so fast and you could whip out a bunch of them quickly for Christmas gifts if you needed to.
Well, I'm positive this is WAY more information than you wanted to know! Thanks for peeking in today---I hope your Saturday is a great one.
I hope to be back tomorrow with my Papertrey Blog Hop project---if I can get it finished and photographed! I should be able to work on it tonight.
Hugs~
Kathleen
Gift Ensemble Stuff:
Stamps: Good Sport (SU!), Rustic Branches (PTI)
Paper: Pure Poppy, Stamper's Select White (PTI), Basic Black (SU!) Romance Dots (Bo Bunny Press), Pious-Scarlett's Letter (Basic Grey) (on bag)
Ink: Craft White (SU!) Palette Noir,
Tools: Cuttlebug, Spots & Dots Embossing Folder, Heat tool
(Provocraft), Nestabilities Tag die (Spellbinders)
Accessories: Vintage Brads (SU!), Pure Poppy grosgrain ribbon (PTI). White Embossing Powder (Ranger)
Saturday, October 25, 2008
Wednesday, October 22, 2008
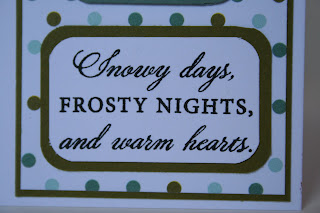
{SFYTT Snowman}
Hello all---
YIKES! Another week has gone by without a post---I can't believe it! I'm working on a lot of Christmas presents, so I haven't gotten much done that I can post yet!
I did decide to do Jen's Sketch for You to Try this week. I always like her sketches, but I hadn't done one in awhile.
I LOVE this little snowman and I had been itching to use this new Papertrey Ink Patterned Paper Polka Dot Parade. I thought the pattern with Ripe Avocado, Ocean Tides and Aqua Mist were perfect for this little guy.
I need to run an errand before I pick up Joshua, so this will be short (OK, as short as I can do!) I used Jen's sketch and the patterned paper, so I already had a layout and a color scheme---what else did I need?
I stamped the snowman and then paper pieced his hat and his gloves. I glued his gloves onto linen thread and stuck them to the dimensional glue dot on the back of the snowman. I used buttons as my accents and I didn't use ribbon---it's a miracle! I decided that linen thread could pass as a ribbon---of sorts---yeah, that's my story! So, there it is--a quick card---just for fun!
Snowman stuff:
Stamps: Made of Snow Paper: Ocean Tides, Ripe Avocado, Aqua Mist, Polka dot Parade Ink: Palette Noir, Ripe Acocado, Ocean Tides Accessories: Foof-a-la buttons, Corner Rounder, Linen thread (SU!), 3-D glue dots (Zots), Swiss Dot CB embossing folder, Cuttlebug
If you are still here---I have to show these two pictures---the first one is honestly just minutes after Joshua woke up on Monday morning--remember he had been to church the day before, so he had the leftover "gel" in his hair. I knew it was time for a haircut---but WOW---nothing tells the truth like a picture. SO, what do you think? Should I have left it?Or, should I have done this? It's really too late to ask, but I just thought I'd get your thoughts!! Ahhh, much better!
Have a great day~
Kathleen
Wednesday, October 15, 2008
ETA: I posted my last post by accident, but it still shows up on Google Reader---if that's how you read it, I apologize---just ignore it and read this one. This one has pictures and has been read through----the other was a VERY rough draft!
I LOVED making my last holiday planner---you can see it here. So I decided that I needed to make a few more---I haven't had much stamping time the last few days, so I was thrilled when I was able to finish this tonight.
If I had been able to just sit down and make this planner without any interruptions, I could have finished it very quickly---but that's not how my life usually works! SO, I worked on it for 30 minutes at a time---a few times! The worst part for me is deciding colors/stamps, etc---I already knew what I was going to make, but I needed to make it look like "Mama"! I thought this angel stamp from Heavenly Heralds (retired SU!) would be perfect for her. I originally wanted to use gold, but I really liked this "Glee" from the Figgy Pudding line by Basic Grey, so I went with Silver. (Speaking of Basic Grey---have you seen the Wassail papers? They are beautiful online---I haven't seen them in the store, but I do think this would be considered a need---don't you think?)
I stamped the angel with silver Colorbox pigment ink and then embossed it with Silver powder. Then I cut it out using a plain square nestabilities die and layered it with a scalloped square. I stamped Holiday Planner---still not straight, but better this time. I used the Upper Formal set from My Sentiments Exactly. I stamped the verse from the same SU! set and embossed it the same as before.
I made these lists for mom and personalized them for her with the Simple Alphabet from Papertrey Ink. I really didn't think I needed that set, but everytime I turned around I saw someone using it, so I decided to try it---I like it. It took me a couple times to get the letters straight, but after awhile you get the hang of it.
Again, I got this idea from Michelle Wooderson's blog. She made a really cute one and has all the measurements and everything if you need them. Anyway, that's mama's planner. I'm going to do at least one more for a friend, so I'll show you that one someday when I'm done!
Thanks for checking in! Hugs~
Kathleen
Angel Planner Stuff:
Stamps: Heavenly Heralds, (SU!), Formal Upper (My Sentiments Exactly), Rustic Branches ("for"), Simple Alphabet (PTI),
Paper: Bravo Burgandy (SU!), Vintage Cream (PTI), Patterned Paper-Figgy Pudding, Basic Grey,
Ink: Bravo Burgandy. Colorbox Silver Pigment Ink,
Accessories: Heat Embossing Tool, Embossing Powder, Silver Sheer Metallic Ribbon (PTI), Nestabilities (Spellbinders), Cuttlebug (Provocraft), 3-D glue dots (Zots), cropadile
Saturday, October 11, 2008
{Family}
HOW 'BOUT THEM LONGHORNS?????
UNIVERSITY OF TEXAS 45
university of oklahoma 35
BLESS THEIR HEARTS!!!!
Ok---for those of you who don't know me---this is just a post for family who we don't see often--so you can skip this if you'd like!
Here's a picture of my "babies" on Hannah's birthday---we always take a picture of them together on birthdays---it's just something that started when the girls were really little and I've tried to continue it!
They are pretty amazing! Hannah's 17, Joshua's 7 & Caitlin is 19...actually Joshua is 7 AND A HALF!!! That half is pretty important at this age!
And here's a picture of my parent's on that same night (October 2.)
Hugs~
Kathleen
Friday, October 10, 2008
{Holiday Planner}
Oh my!!! It's really been over a week since I posted? That's AWFUL!!! Between Hannah's birthday celebration(S) and getting my Christmas music together for my students at school, I've been swamped---oh and there's that part of my life like being a wife and mother and maid and cook and gardener and spelling word caller outer---you know what I mean? Ahhhhh....I know many "empty-nesters" who tell me that they only wish their house was bustling now, so I'm trying to embrace the insanity....I'm not sure if that makes me supermom or crazy, but it is what it is!!!! SOOOOO, there's my lame excuse for not posting!
Yesterday, while I should have been making Hannah's treats for her birthday party MUCH cuter than they are, I decided to make one of those wonderful Holiday Planners that Michelle Wooderson inspired me to make in the above post. After 3 attempts to get the measurements right, I finally got it "pretty close", so this first one will be mine! I'm going to make one for a few other people in my life---I already had the notepads from some other project that I wanted to do that never got done, so I decided to go for it.
I started out with a 5x8" mini legal pad. I used a piece of Kraft cardstock and cut it to 8x11. I'll let you check out Mish's post for the tutorial---there's no use in doing one when she has done a great one....but don't compare mine to hers---it's my FIRST ONE---it's a little rough, but I still like it! AND SHE'S AMAZING---ok, enough yelling.
I stamped the snowman from Made of Snow....LOVE this set---it's all in parts, so you can create the perfect snowman for your mood--with a scarf, without a scarf, with a hat, without a hat, with a scarf and no hat, with a scarf AND hat....you get the picture!!! Anyway, I paper pieced the scarf and hat with Pure Poppy and Spring Moss cardstock, then I used Stickles for the polka dots on the scarf. I colored the nose and outlined the snowman for some highlights with my Prismacolor 20% Warm Grey marker. I added black gems of "coal" for his buttons and cut him out with a square nestabilities die---then added a scalloped square in Spring Moss.
For the bottom of the planner, I used some Holiday Vintage Prints Patterned paper from Papertrey Ink and spelled out Holiday Planner using stamps. I didn't plan well and had already put the patterned paper down before I got a chance to measure my letters, so I had to put them on a little wonky to make it work. I used some Old Olive and some Real Red brads to continue the Colors in the paper. I used Michelle's idea of putting the vowels in one color and the consonants in another....except I messed up and made the Y in the "vowel" color----oh well, it's a "sometimes vowel"---right? Ah, yeah, that's it...anyway, like I said, this one is MINE and it just won't drive me crazy that I messed up---if I was giving it to someone else, I'd have to start over! I separated all of this with some 5/8" grosgrain ribbon in Old Olive---LOVE that color!
Anyway, after I figured out the measurements (and they aren't quite right, but I think I may have it for my next one....) this went so fast! I didn't do a lot of other fancy stuff on it because it will likely spend a lot of time in my purse and that is a scary place! I'd encourage you to do one of these if you are a list maker---it will help me stay organized this year and I LOVE organization---especially at Christmas. This wife/mama/music teacher/cook/maid/gardener/spelling word caller outer needs all the help she can get at Christmas time!!
Have a great weekend~
Kathleen
HOLIDAY PLANNER schtuff:
Stamps: Made of Snow, My Sentiments Exactly Upper Case Formal
Paper: Kraft, Spring Moss, Pure Poppy, Stamper's Select White, Holiday Vintage Prints (PTI), Old Olive (SU!)
Inks: Stazon Jet Black, Old Olive (SU!), Pure Poppy (PTI)
Accessories: Real Red Brads, Old Olive 5/8" grosgrain ribbon, Dimensional Glue Dots (ZOTS!), Cuttlebug (Provocraft), Nestabilities Dies (Spellbinders), Black Gemstones (Hero Arts), 20% Warm Grey Prismacolor Marker, Diamond Stickles (Ranger)
Thursday, October 2, 2008
{Hannah's Birthday}
Hannah is 17 today! I can't believe it....they just grow up so fast. I have a few things that I'm doing for her birthday, and I'll show them to you in time. This is a picture of her somewhere in England this past summer. I'm not sure where, but if I had asked her, she wouldn't have wanted me to post anything!!! It may be C.S. Lewis's garden. She talked and talked about that when she came home!
This picture was taken this summer in Ephesus when she went there. What a world traveler she's been! Now, I know I'm her mom, but if you knew Hannah, you would love her! She's a thoughtful, kind, independent girl. She has known what she's wanted to do for years and unless the Lord changes things, I think she'll do it. She loves good literature and is a huge fan of British Literature---thus the trip to England this summer. She's in her Junior year, so all the insanity is looming in front of her...but she's ready for it (most of the time.) OK, I could go on for hours, but I'll save it for a note to her! Thanks for indulging this mama! Now onto the card!!
Hannah is a bookworm---seriously....so when I saw this Bookwormabella by Stamping Bella, I had to have it. I haven't even used it until now, but I bought it just for her, so now is a great time! I'll leave off the details today, but if you have any questions about any of these projects, please don't hesitate to e-mail me!
Hugs~
Kathleen
Bookwormabella for Hannah supplies:
Stamps: Bookwormabella (Stamping Bella), Mixed Messages (PTI)
Paper: Dark Chocolate, Vintage Cream (PTI), various from Urban Couture (Basic Grey), Old Olive (SU!)
Ink: Stazon, Blush Blossom, Old Olive, More Mustard, Chocolate Chip, Creamy Caramel, Really Rust, Craft White (SU!)
Accessories: Dark Chocolate Satin Ribbon (PTI), Scor-Pal, Oval & Scallop Oval Nestabilities (Spellbinders), Cuttlebug (Provocraft)
Wednesday, October 1, 2008
{Easy Post-it Note Holder}
Do you love the Target Dollar Spot? I DO! I often find cute things to alter and give as gifts. I am the Upper School Room Parent Coordinator at my kids' school (it sound very official, but no one would do it and I can send e-mails, which is mostly what the job requires!) and I had a meeting yesterday morning with the mom's who have volunteered to be "room parents" for each grade in the Upper School. I wanted to give them SOMETHING for all their time and when I walked into Target on Sunday I found just the thing. I found these cute little fall themed post-it notes! I LOVE fall and anything with that theme!
I used the tutorial that Emily Giovanni has on her blog. You can find it here. My post-it's where
3 1/2" square instead of 3" like her tutorial, so I had to alter the measurements, but this was so simple. I made 9 of them in about 2 hours---it would have been MUCH faster had I not decided to cut out the acorns. I didn't have a punch that fit it just right, so I decided to cut it out---my wierdness coming out...yes, I made up a word! I also made some with Dark Chocolate, but those pictures didn't turn out very nice, so I just posted these.These would make a great gift for someone and wouldn't cost you much....we don't count the cost of the other supplies, because we already paid for them, right? So this gift was just $1!!! I have cleaning to do, so I'm going to run~I hope you have a great day. E-mail me if you have any questions---
Kathleen~
Post it note holder supplies:
Stamps: First Fruits (PTI)
Paper: Old Olive, Pumpkin Pie (SU!), Dark Chocolate, Summer Sun, Vintage Cream, First Fruits Patterned Paper (PTI)
Ink: Old Olive, Pumpkin Pie, Chocolate Chip (SU!), Summer Sunrise (PTI)
Accessories: 1 1/2" circle punch, scallop circle punch, dimensionals, Pumpkin pie 1/4" grosgrain, Old Olive 5/8" grosgrain ribbons (SU!), Summer Sunrise twill (PTI)
Subscribe to:
Posts (Atom)